- 3.1 Wi-Fi Monitor(WTH8266)
- 3.2 Wi-Fi Monitor(WTH3080)
- 3.3 GPRS Monitor(GTH202)
- 3.4 GPRS Monitor(GBTH202)
- 3.5 LTE Monitor
- 3.6 Firmware Upgrade
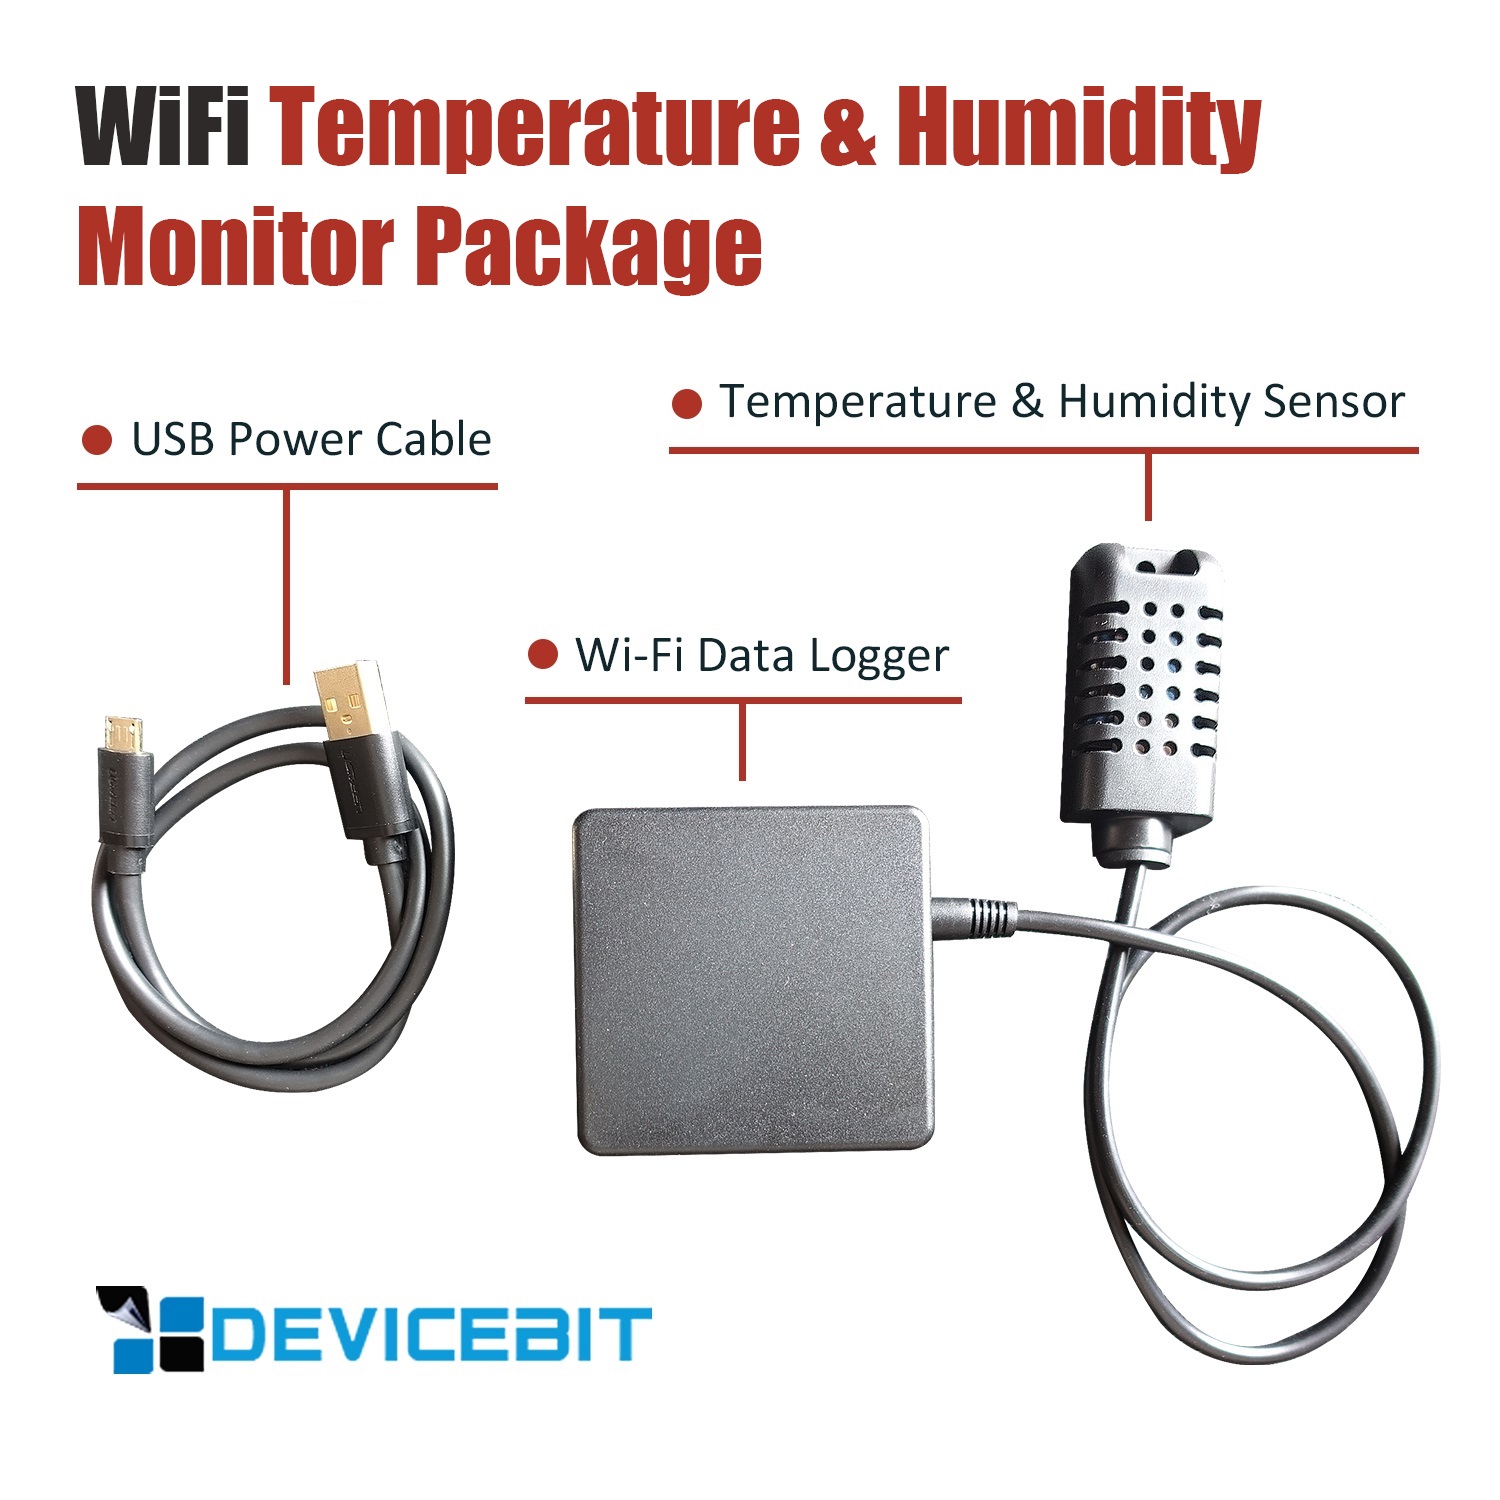
1. Hardware Package
Package 1 (Temperature only):

Package 2 (Temperature and Humidity):
2. Wi-Fi Setup
Plug the sensor cable and USB power cable and power on the monitor. Next you need to setup the Wi-Fi configuration to connect the monitor to the Wi-Fi network of your home router.
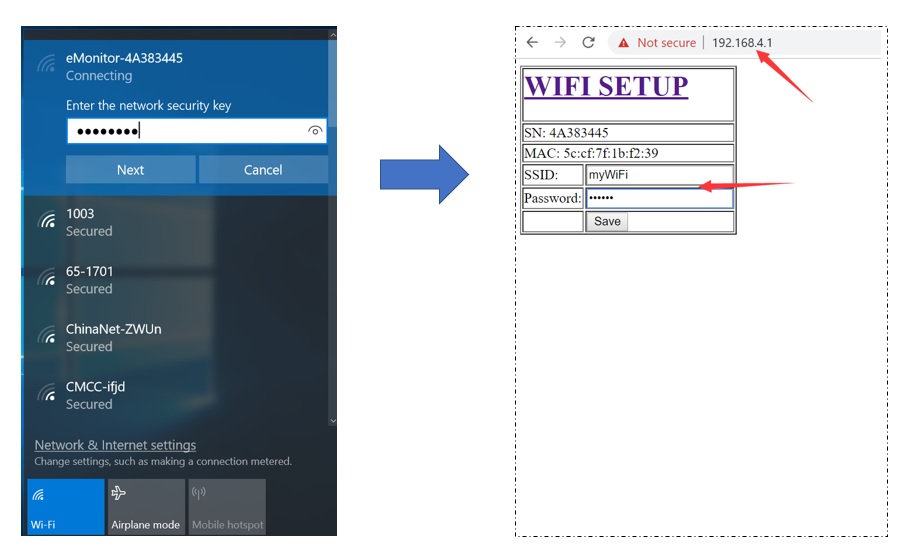 Step1, Use your smart device's Wi-Fi connection setup, connect to the iMeter's network, which will show up as eMonitor_xxxxxxxx (xxxxxxxx is unique device SN). The password is 12345678.
Step2, Whilst connected to the eMonitor's network, open a web browser and navigate to http://192.168.4.1;
Step3, Connect to your home router by manually input the SSID (your home Wi-Fi networks' SSID) and Key (your home Wi-Fi networks' password) and then click "Save"
Step4, If the Wi-Fi monitor successfully connected to your home router after configuration, its Wi-Fi network will be disappeared. You can find the Wi-Fi monitor in your PC's network, which will be shown up as eMonitor_xxxxxxxx (xxxxxxxx is the unique SN of eMonitor).
For next step, if you will monitor the data on DeviceBit Cloud, please refer to Chapeter 4: Operation on Cloud; if you will upload the data to your own server, please refer to Chapeter 5: Connect to Your Own Server; if you will monitor the data locally via LAN on your PC, please refer to Chapeter 6: Monitor Locally via LAN.